Plus, a bonus no-knead version – the world’s easiest hot cross buns recipe!
Hot Cross Buns
Big, fluffy, fragrant Hot Cross Buns just like what you get from your favourite bakery are easier to make than you think. Especially if you have a stand mixer. Homemade Hot Cross Buns become a dump-and-mix job to make the dough. Definitely my preferred method! These Hot Cross Buns are way better than the stock standard ones you buy from grocery stores. Those are pumped with preservatives and have a distinct artificial flavour about them. Once you’ve tried homemade, you will never go back. I haven’t! BONUS: Make the dough today, bake them fresh tomorrow!
What you need for Hot Cross Buns
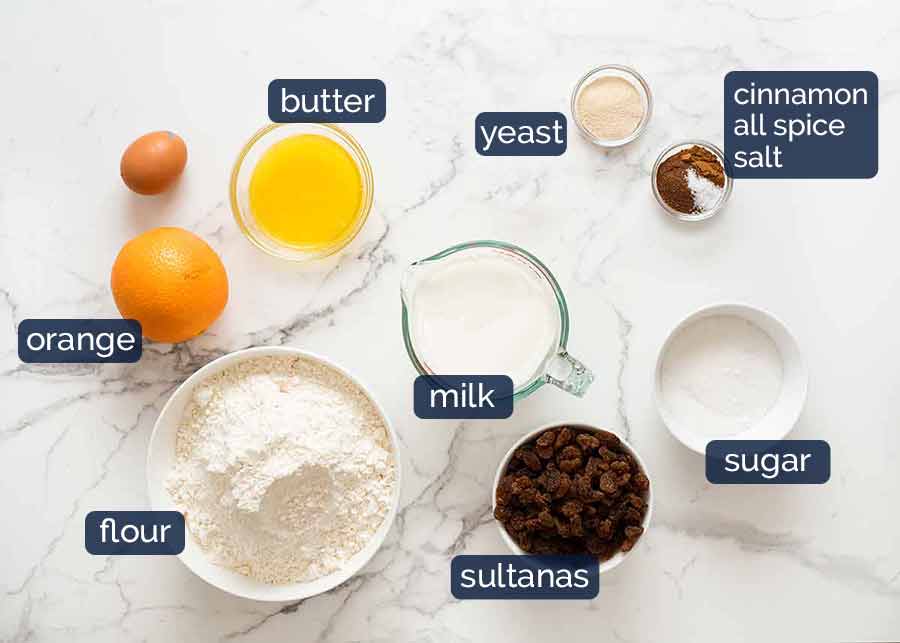
Here’s what goes into homemade Hot Cross Buns. You can make this recipe with any type of yeast – rapid rise, instant, active dry or even fresh yeast. Directions have been provided for all.
Different types of yeast – use any
There are 3 different types of yeast and you can use any of these to make Hot Cross Buns:
active dry / dry yeast – yeast in powder form that is best used after dissolving in warm liquid then left to get foamy before mixing in dry ingredients (like for Bread Rolls) instant yeast / rapid rise yeast (used in this recipe) – this yeast makes the dough rise faster and does not need to be dissolved in liquid first, just mix everything at the same time; fresh yeast – comes in block form, just crumble and dissolve in liquid.
Hot Cross Buns – Choose from 3 Methods
In this Hot Cross Buns recipe, I’m going to give you three different ways to make the dough: Method #1 and #2 is recommended for best results, #3 is the easiest.
How to make Hot Cross Buns
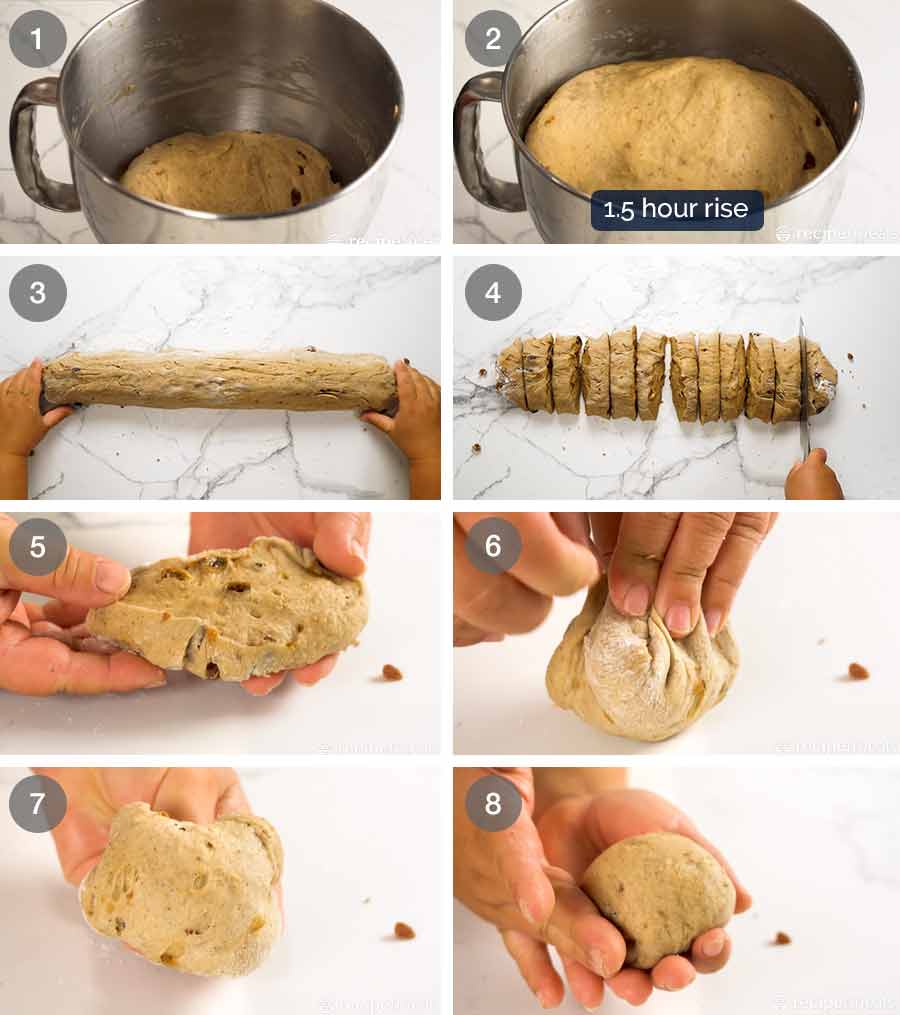
PART 1 – THE DOUGH
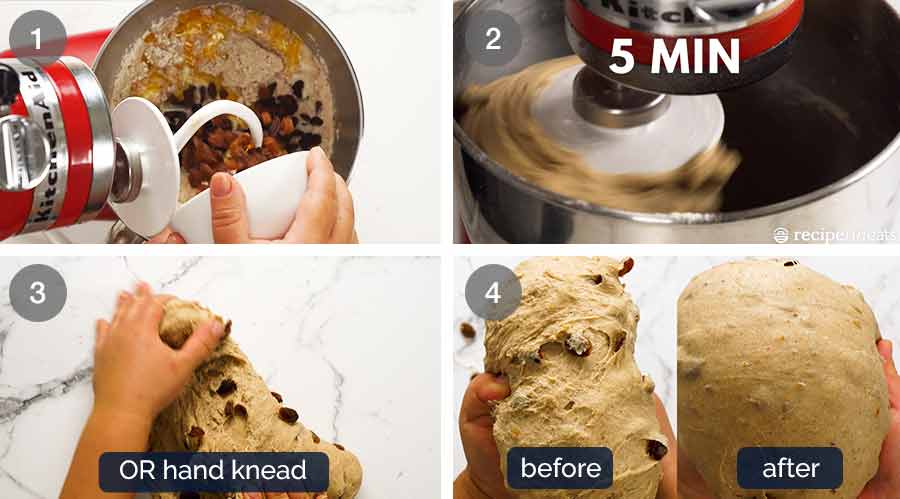
This is an easy method where you simple put all the dough ingredients in a bowl, then mix on speed 2 for 5 minutes OR knead by hand for about 10 minutes. Your dough is ready when it is smooth and elastic – see #4 below for a Before and After Kneading comparison.
PART 2 – RISE
Once the dough is smooth, place it in a bowl, cover with cling wrap* then leave it in a warm place until it doubles in size. My no-fail place is the dryer! Run it (empty) for 3 minutes, then turn it off and put the bowl inside. Warm and wind free – perfect dough rising conditions!
- I know cling wrap isn’t an environmentally option, but it really is the most effective and safest. Wet towel gets cold which can compromise the dough rising, a plate or pot lid doesn’t seal enough to trap warmth and humidity.
PART 3 – FORM BALLS
To form the balls that bake into smooth round Hot Cross Buns, I find the best method is as follows:
Shape dough into log, cut into 12 pieces; Take a piece, then bundle it up like a moneybag – this will stretch one side into a smooth round dome; and roll/press/shape into a neat ball, the place the ball into the baking pan smooth side up.
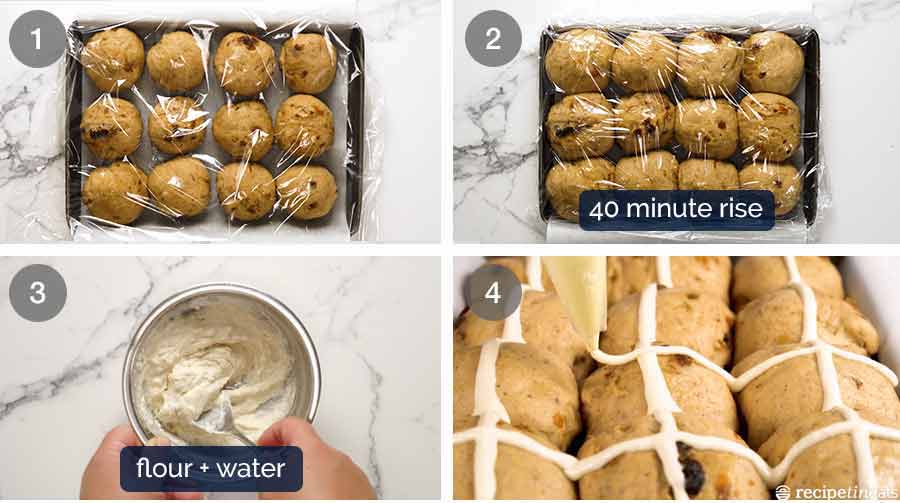
PART 4 – Rise #2
Spray cling wrap with oil, then loosely drape over the buns. Leave for 40 minutes until they almost double in size – about 75% is enough.
PART 5 – HOW TO MAKE THE CROSSES for Hot Cross Buns
Simple mix of water and flour, the trick is ensuring it is the right consistency. Too thin, and it will run everywhere when it’s in the oven. Too thick, and you end up with stiff, hard sprigs on the surface of your soft buns!
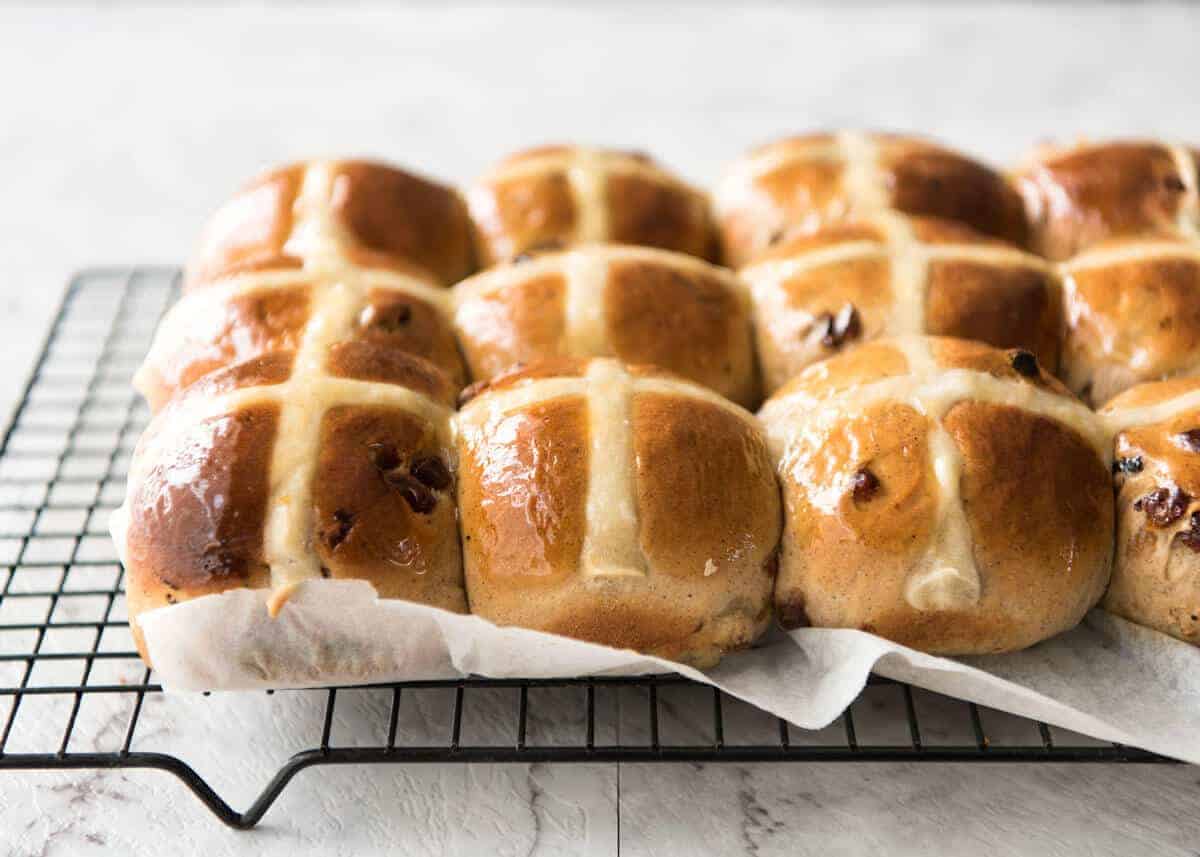
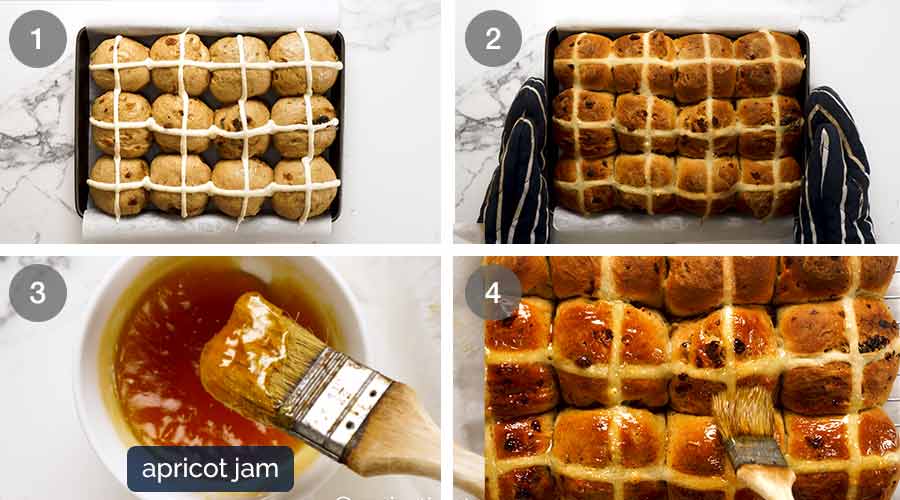
PART 6 – BAKE!
Bake for 22 minutes or until the buns are a deep golden brown. I find that colour is the best indicator for this recipe. Pale = undercooked. Burnt = 😩
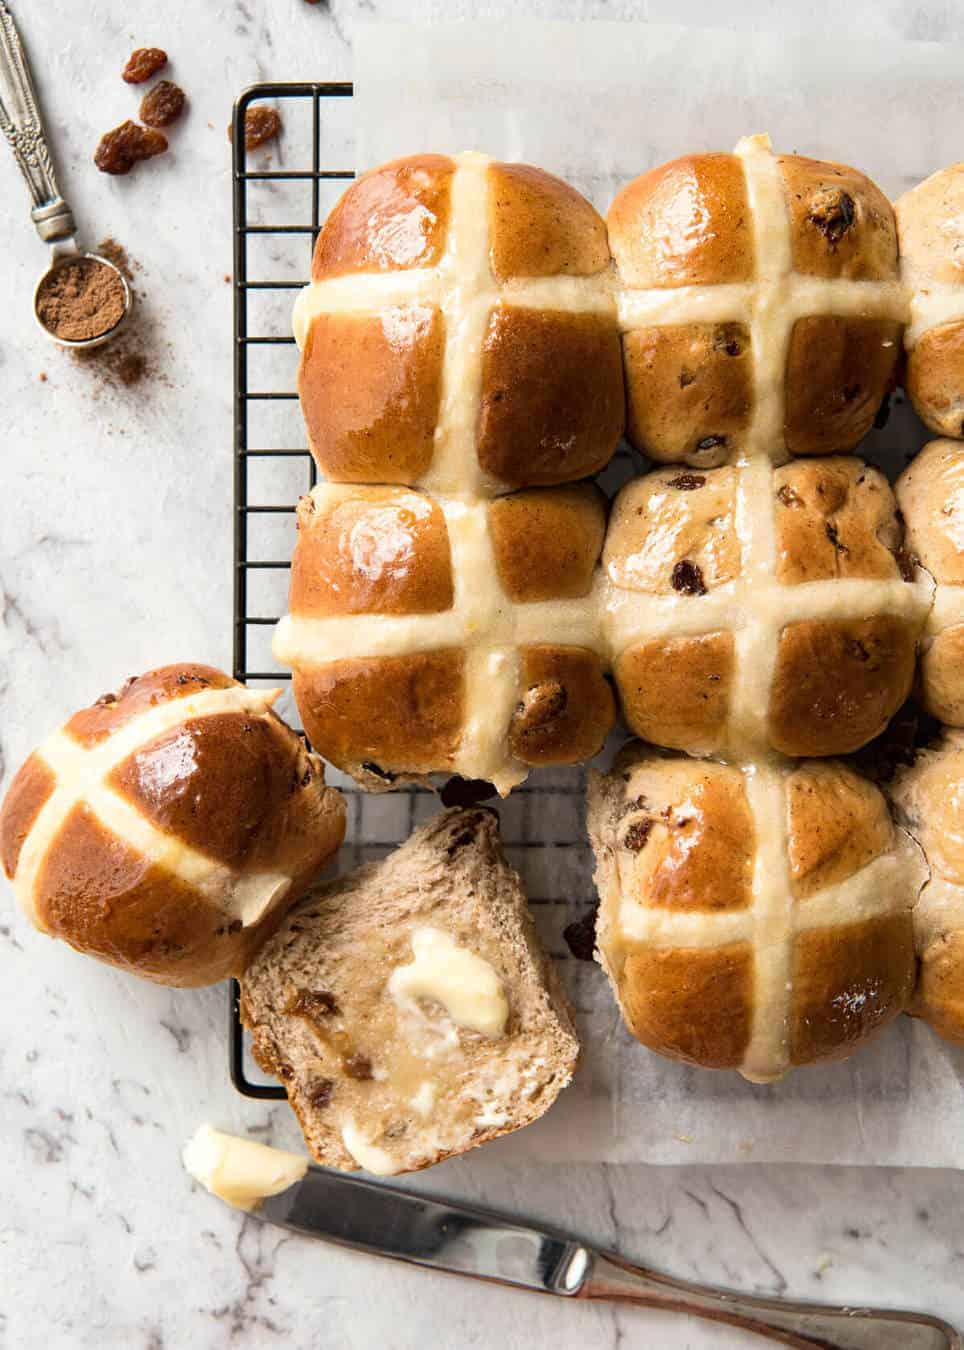
PART 7 – GLOSS!
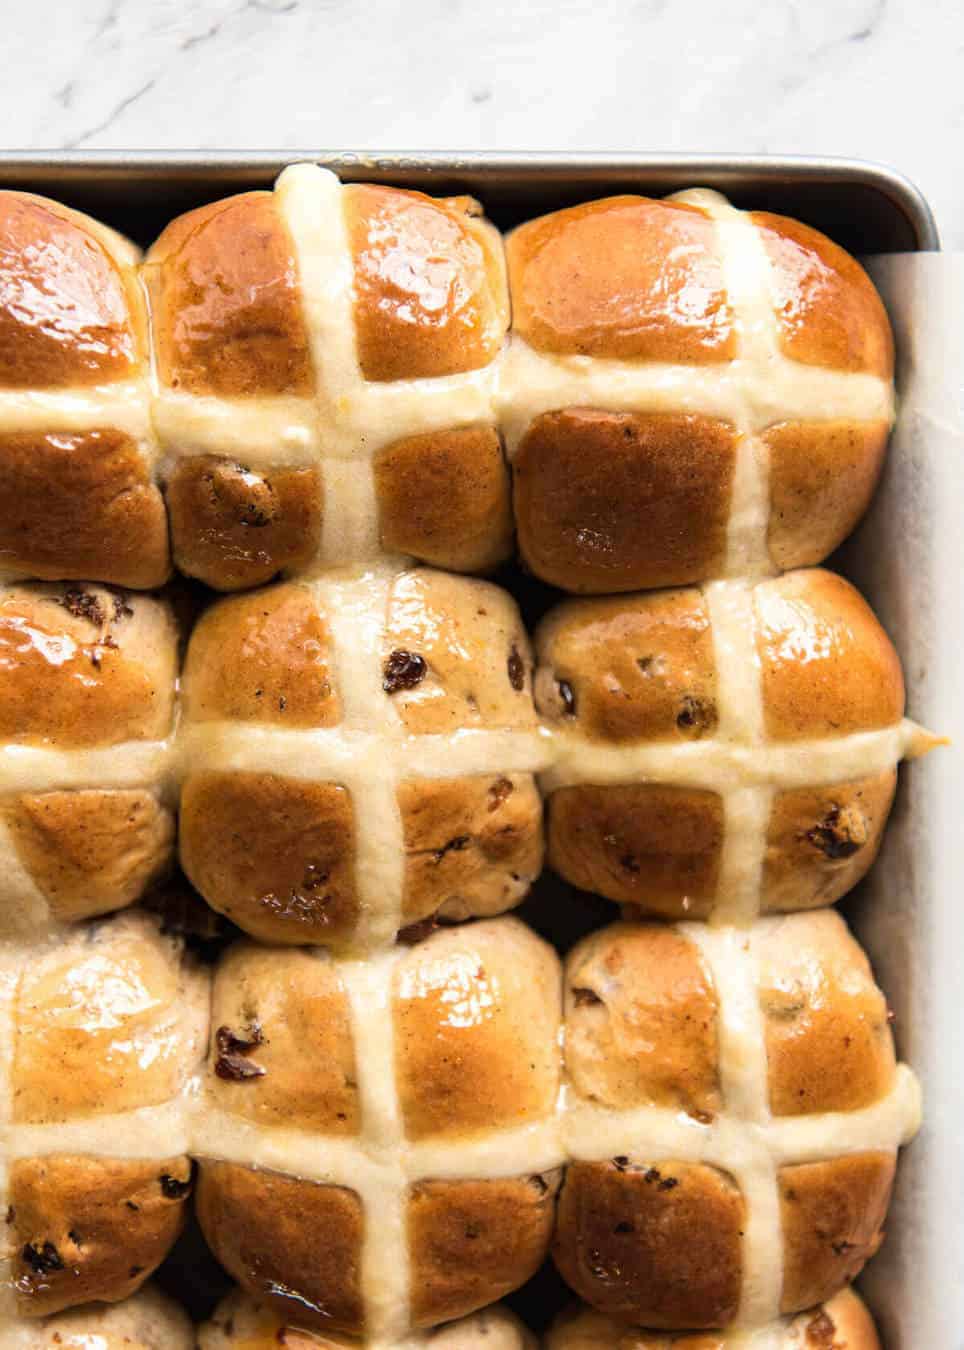
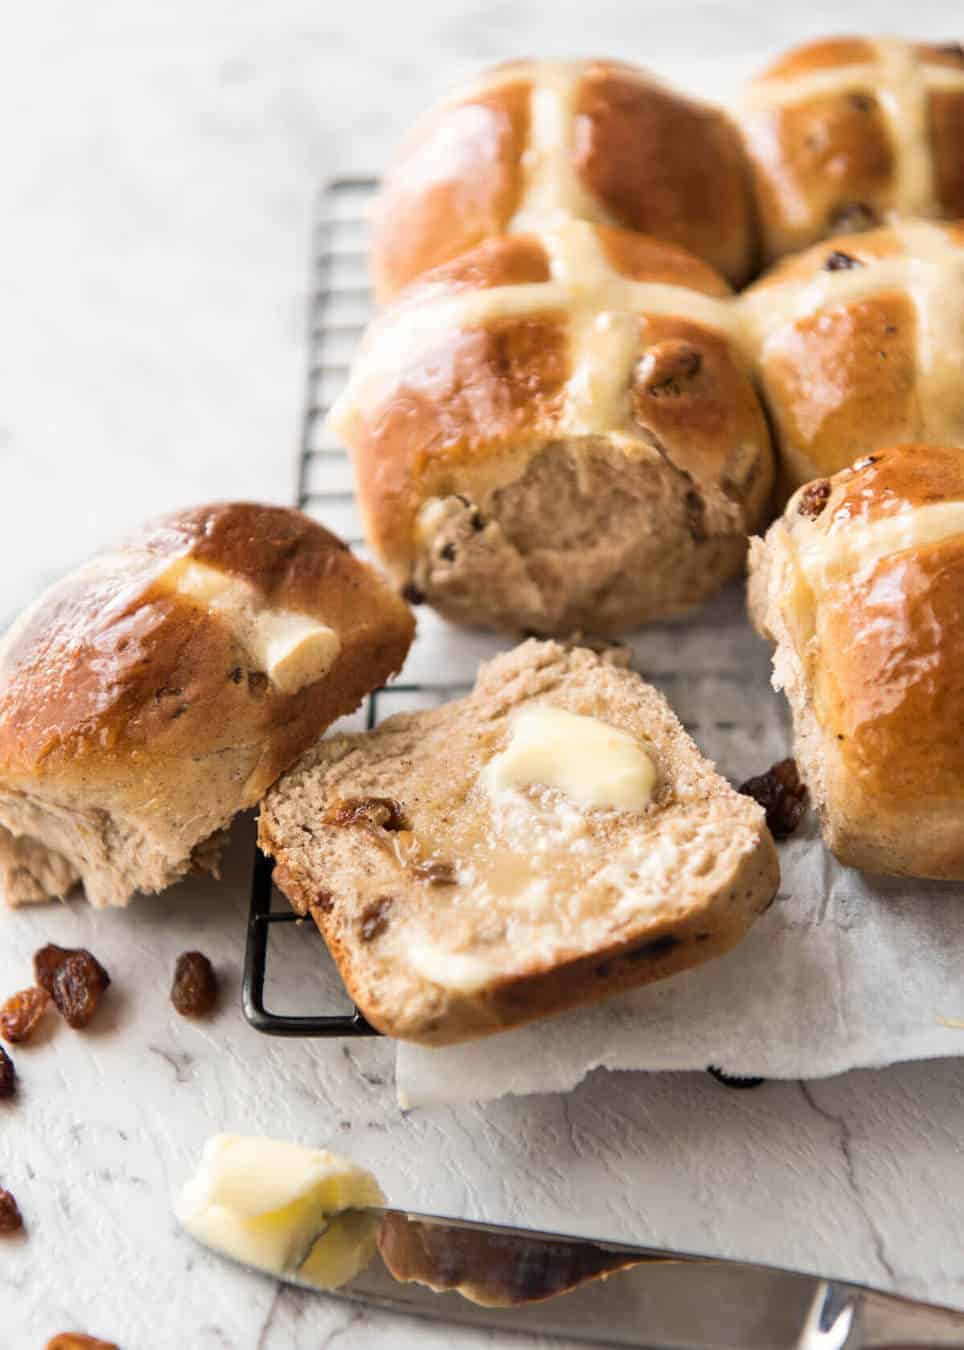
The lovely shiny finish on Hot Cross Buns is simply a mix of heated apricot jam and a touch of water. Just microwave to heat, mix until smooth then lightly brush onto the surface. Substitute with other jams, or honey, maple syrup, golden syrup or other shiny syrups.
Tips for the BEST Hot Cross Buns!
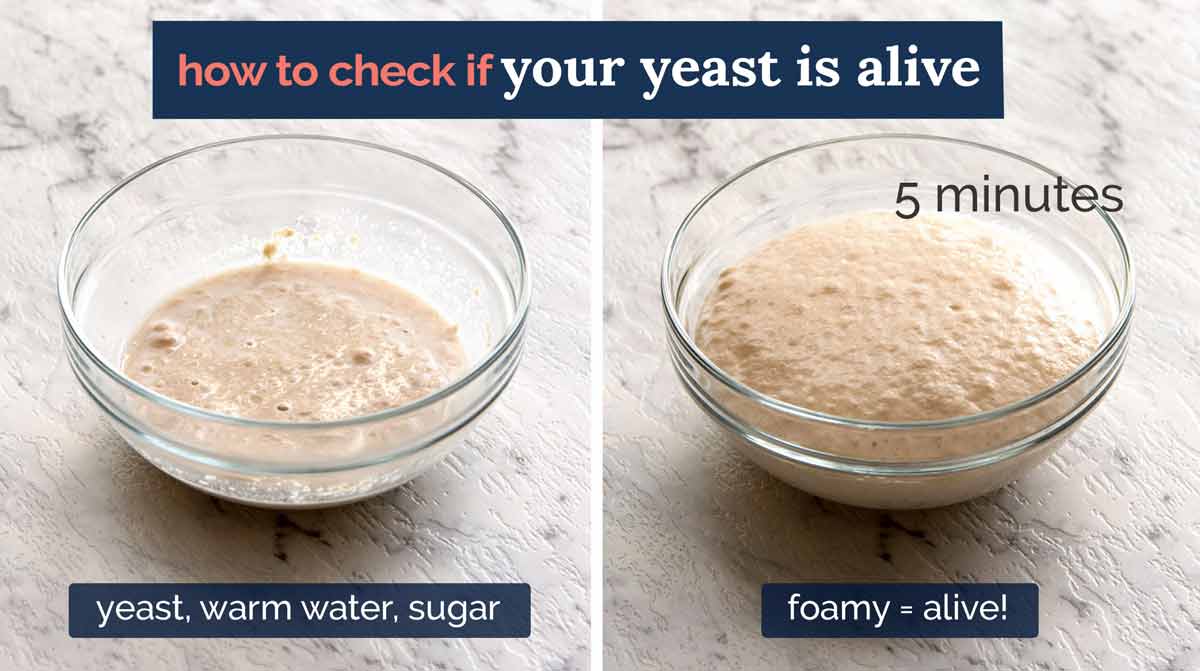
CHECK YOUR YEAST expiry date! The #1 problem because most people don’t bake with yeast very often, and yeast does go off! If your yeast is past its expiry date OR you’ve kept it in hot humid conditions (instead of fridge or freezer), your dough will not rise. Yeast test if you’re concerned: in tiny bowl, mix 2 tbsp very warm tap water with pinch of sugar and 1/4 tsp yeast. Leave in very warm place for 5 – 10 min. If surface gets foamy like the below, your yeast is alive and fine to use.
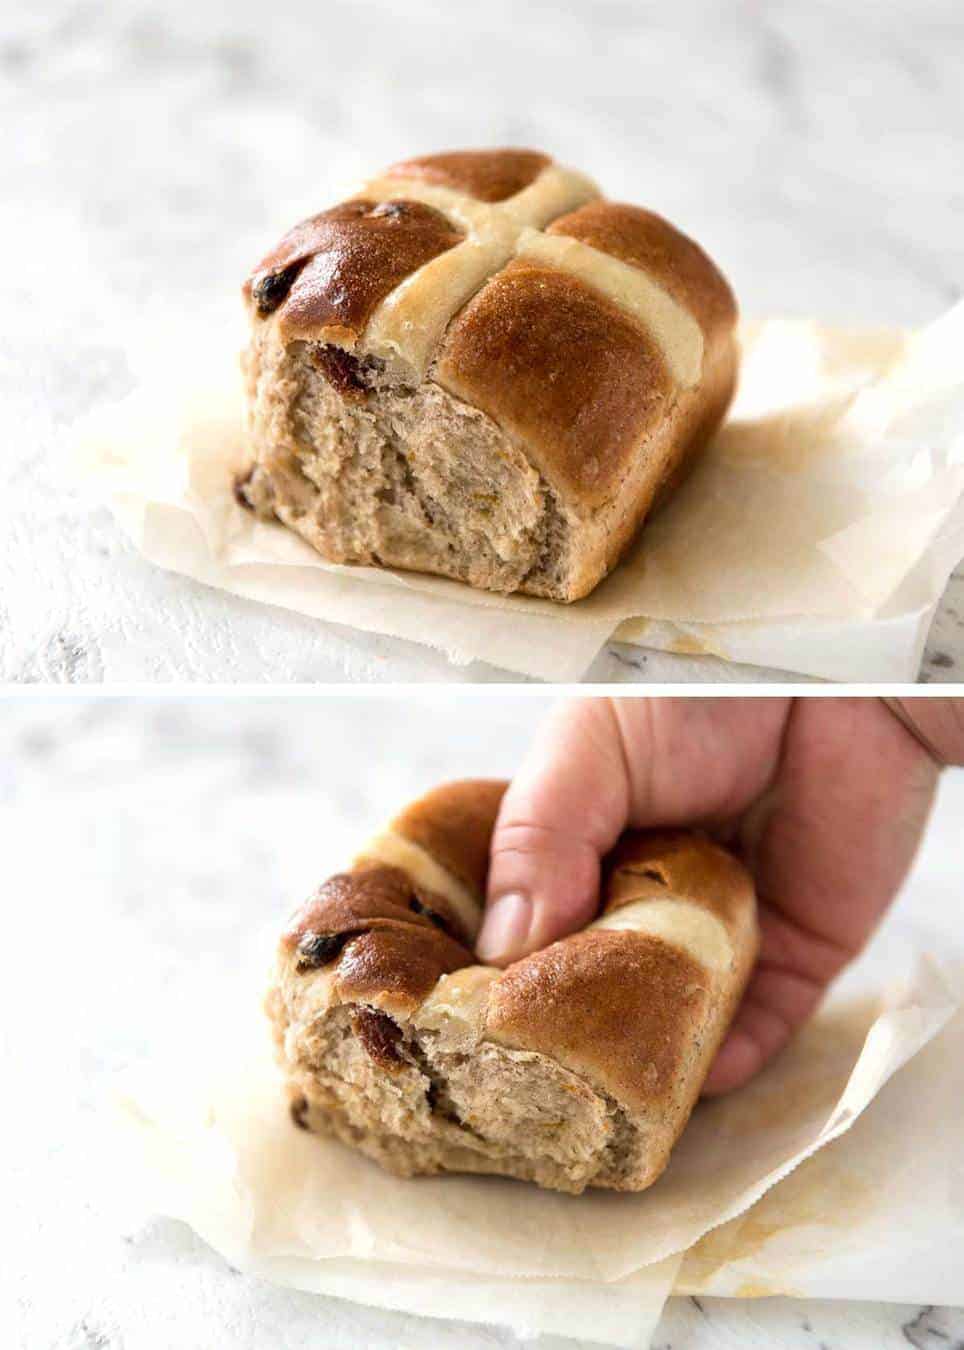
Dough consistency is key. The stickier the dough, the softer and more moist your buns will be because soft dough = easier rise. So you need to use the minimum amount of flour you can get away with so the dough pulls away from the side of the bowl when mixing, but is still soft. Too much flour = dry hard dough = no rise = buns as hard as rocks Start with less flour – it’s easier to add more flour to get the right dough consistency, rather than trying to salvage dough that’s too dry by mixing in more liquid. So this recipe starts with 4 1/4 cups of flour which should be a touch under what you actually need, then calls for adding up to 1/4 cup Extra Flour so it’s not too sticky; Humidity, weather and flour brand all affect the exact amount of flour you need. I use the full Extra 1/4 cup flour in summer (hot, humid, warmer dough = stickier & softer)) and I often do not add any Extra flour in winter (cold = dough cools faster = less sticky). Smooth dough – see above and in the short recipe video below for a before/after kneading comparison of how the dough should look. If you don’t knead enough, your buns will not be soft and fluffy! No stand mixer and can’t be bothered to hand knead? Use the No Knead Hot Cross Buns method provided! Read more about it below. No yeast? Sorry, this recipe won’t work without yeast! Don’t skip cooling the buns – I know, I know, you want to rip into these buns when they’re fresh out of the oven. But don’t! If you do, they will seem doughy inside. They look cooked, but have a doughy texture when you bite into it. They need 20 minutes to finish cooking / dry out the inside.
Ultra-easy option: No-knead Hot Cross Buns
This is the easiest way to make Hot Cross Buns, and I’ve provided it as an extra recipe at the very bottom of this post. No-knead Hot Cross Buns are exactly as the name says – Hot Cross Buns that are made without kneading the dough. The dough mixture is looser, almost like a thick muffin batter, that you mix with a wooden spoon, then leave it to rise and proceed with the same steps as above. The end result is marginally different to the kneaded version. The buns rise a touch less, and they do not keep as well – they are a bit drier the next day. I say that do not rise quite as much, but they’re still super soft and fluffy. See?
There are very few things in this world that can rival the smell of freshly baked homemade Hot Cross Buns, fresh out of the oven. It’s a smell we only get to enjoy once a year, around Easter. So let’s make the most of it! – Nagi xx
Watch how to make it
Hot Cross Buns recipe video! NOTE: This is for the classic kneaded Hot Cross Buns, not the No Knead version. For the No Knead Hot Cross buns, see recipe intro for links to relevant video.
Originally published March 2017, updated April 2020 with a brand new video and new process steps.
Most Popular Bread recipes!
Life of Dozer
Don’t worry! It’s a dog friendly Easter egg!!